UDI – User-driven installation is a brilliant component and a feature that comes as part of the Microsoft Deployment Toolkit (MDT),
Many system center guys around the world that are not familiar with MDI, thereby I decided to write this article and brief you about MDT possibilities, and later on, you’re going to see how to deploy it.
- It’s going to be a long article, consider bringing water and delicious snack, have an enjoyable reading experience.
UDI wizard allows us to create a wizard during a task sequence deploying, you have the ability to allow to your IT guys who deploy the task sequences to select which OU the computer will be assigned, which software and application he wants to install, what time zone, BitLocker, languages, printers, and even you can create a custom page, it’s up to you, whatever you plan and decide it will show up on the UDI wizard, try to think about that, these steps save time, Office installation, Office languages, R&D tools, and anything you are installing post image deployment.
You can download it from the following URLs:
Microsoft Deployment Toolkit 2012 Update 1:
https://technet.microsoft.com/en-us/library/ee376932.aspx?f=255&MSPPError=-2147217396
Microsoft Deployment Toolkit (MDT) 2013 Update 2:
https://www.microsoft.com/en-us/download/details.aspx?id=50407
As soon as you installed it, search for “Configure ConfigMgr Integration” and Integrate MDT with your ConfigMgr:

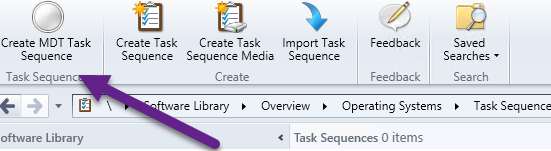
Great, now we have to create the “MDT Task sequence”:
 Client Task Sequence:

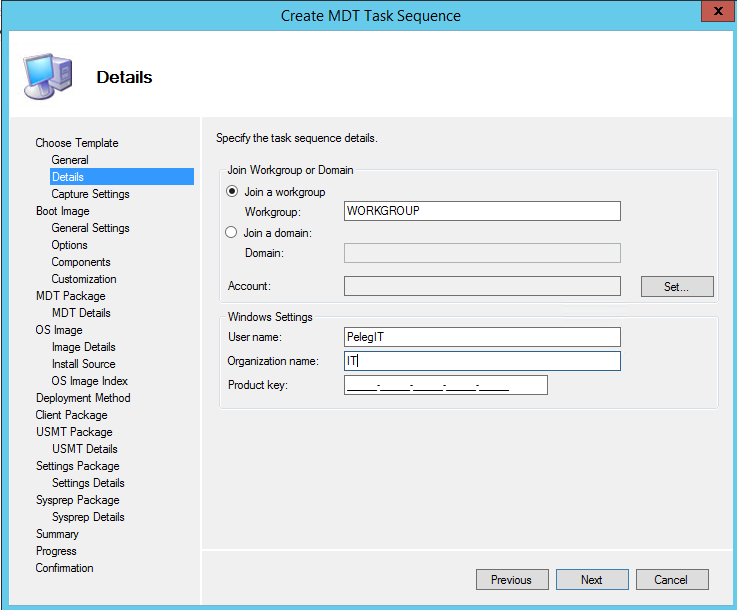
Choose Windows Settings either Workgroup or Join
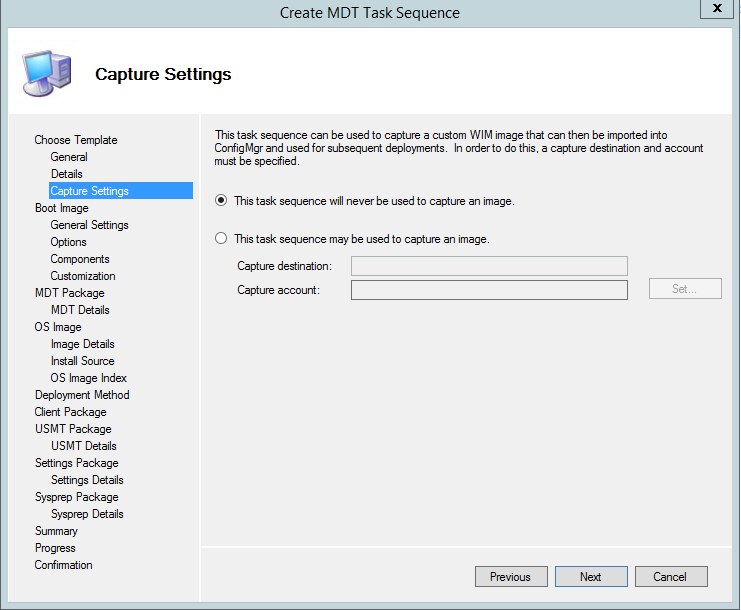
This task sequence will never be used to capture an image:
Specify “Boot Image” and path for MDT Package, we need to access to this package:
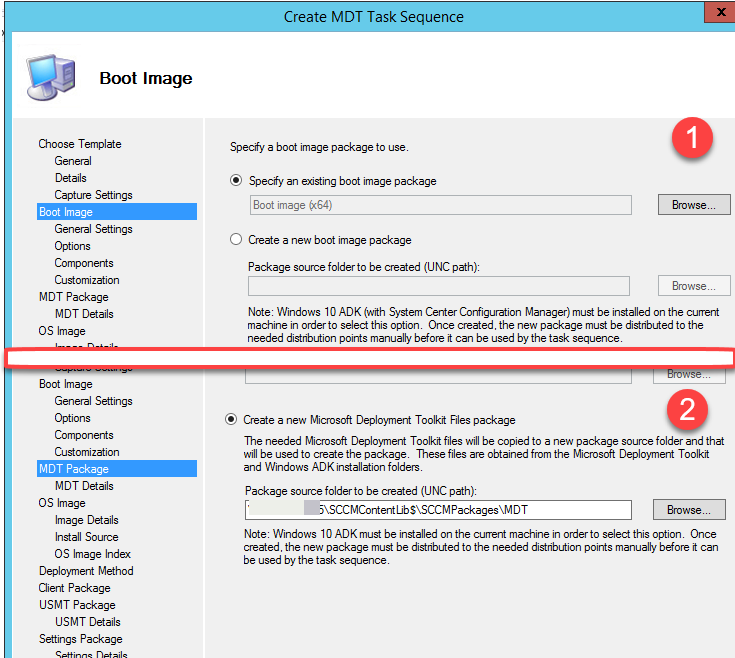
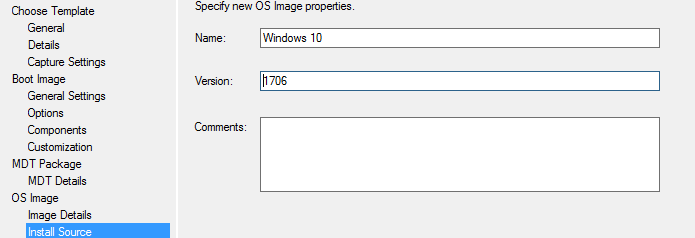
Continue with OS image, Image details, install Source and so on:
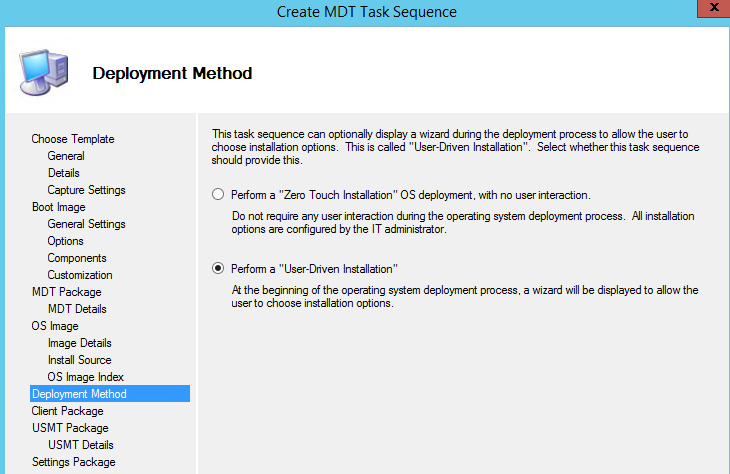
- Important, select the “User-Driven Installation”:
- As you can read and understand, the first option won’t let you select application during TS deployments contrary to the second one which allows you to select installations options
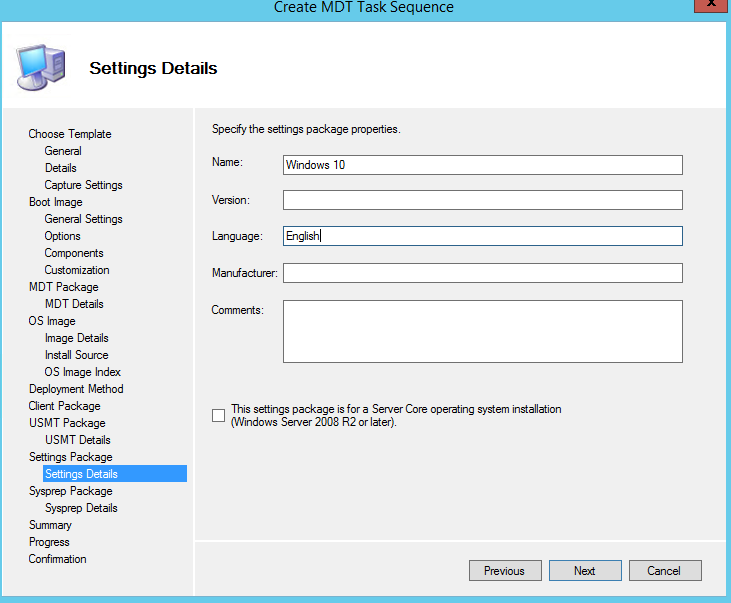
New path for “Custom settings” package, we need this as well, we have to change some default parameters later:

If you get an error about permission denied, most likely you should grant to “Everyone” the access permission [Share] to the folder that contains the MDT content.
Distribute MDT Package and Custom Settings to your DP.

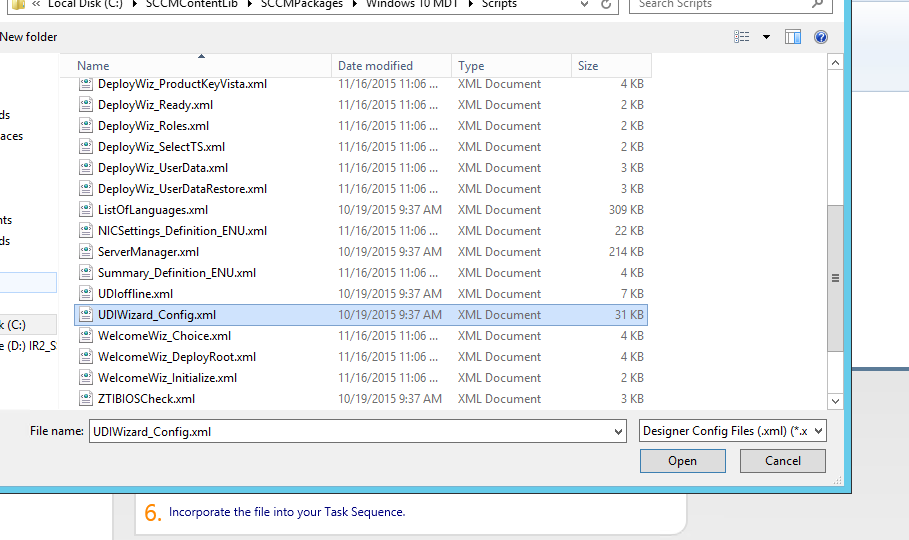
First, we should find the “MDT Package” and then edit it, open the UDI from your windows and open the “UDIWizrd_Config.XML” file:
- I would suggest copying this file for a missing or corruption use case
- As you can see, by default it comes with 3 stage group > New Computer, Refresh and Replace, Remove refresh page and Replace page.
Now wait:
Before we can carry on, create a new collection and don’t add any SYSTEM or USER, intentionally, it supposes to be an empty collection, then we deploy to this collection any software and application we would like will be available in a selection list on UDI:

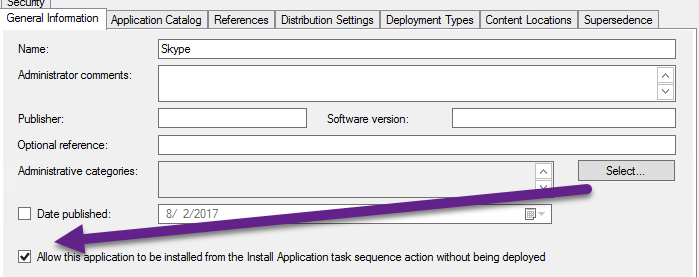
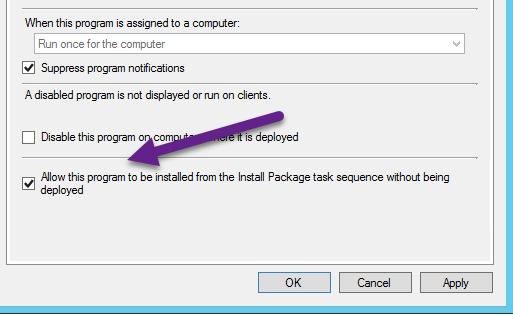
– Ensure you are enabling the “Allow this program to be installed from the Install Software task sequence without being advertised” (Package >Programs ) and “Allow this application to be installed from the install application task sequence action without being deployed” on (On Application properties – General Information), look below the figures:
Package – Under Programs:
Deploy the packages and applications to UDI Collection (As Available, No wake-up, No schedule, and No maintenance windows):

Assign the UDI to the empty collection you have been created,
Application Collection: “UDI Deployment“:

Add application and packages to the “Software list“:

Package:

Select the search button and you will get all available packages you’ve deployed to the particular collection:
Application:

Prepare a list, with Office versions, browsers, tools, domestic tools, anything you want, eventually it will look like this:
- If your applications are marked as grayed-out, it means that you haven’t allowed them to be deployed into TS- scroll up and allow it.

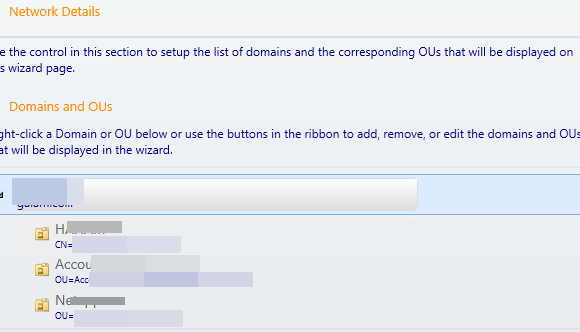
Under Computer details you can add your AD domain and let to a user who deploys the computer to select an OU, you just have to add all OU’s:
Set Local Administrator, User Account and password text box:

Volume settings:

BTW, you can also allow Bit-locker option during image deployments.
- “Unlocked” bottom means that if you set it as a lock, a user can’t change this value during deployment.
Once you finish with that, please save the file and go to SCCM and update your DP’s about some changes you have done:

Before distributing “Custom Settings” as well, open the file and skip some settings that you would like to:
SkipCapture
SkipRoles
SkipProductKey or OverrideProductKey
SkipComputerBackup
Update this package to your DP as well.
That’s all guys, yeah it was long, but worth it, you can take it in different directions, and customize your own pages, for example,
At my last company, we had several branches over the world, each site with local language, time zone, keyboard, applications, so it was perfect for them, as they could customize their own settings as user required.