Manual Exchange database migration is a hectic task as there are various challenges you may face during or after the migration. However, you can simplify the Exchange database migration by using professional software. All you have to do is find efficient software and gain the knowledge to use the tool. Manual Exchange database migration is like a walk on eggshells, a little misstep, and all your data will play hide and seek with you, and you will never find your data again. An automated Exchange database migration software needs arise to eliminate the tediousness and loopholes of the manual method. Today I am writing about Shoviv Exchange Recovery Manager, reliable software for EDB to Office 365 migration and EDB file recovery.
The software is tried in the most complicated scenarios, and every time this tool becomes a data savior.
Shoviv Exchange Recovery Manager:
Exchange Recovery Manager by Shoviv is an effective and recommended solution for the migration of EDB File, Exchange Server mailboxes, Office 365 mailboxes, and Outlook Profile store. The software efficiently recovers the corrupted EDB files and enables the users to import added sources into Live Exchange, Office 365, and Outlook profile stores. The software also allows migrating added source to HTML, MSG, EML, and RTF file formats.
Free Software Variant:
The free demo evaluation version of this software allows users to migrate and save the first 50 items per folder with all the licensed features. The free trial version is provided to check the software efficiency before purchasing it.
Licensed Version:
Shoviv Exchange Recovery Manager comes up with three licenses: Standard License, Corporate License, and Technical License. Different licenses for different needs. You can choose the software license as per your requirements. The license version provides free technical support and upgrades for a lifetime. Hence, users do not need to pay any extra charges for technical support and software upgrades.
How to Install Shoviv Exchange Recovery Manager:
The process to Install Exchange Recovery Manager is very easy and straightforward. Open the Product page of the software, verify the system requirements, and download the software. Once the software is successfully downloaded, locate the installer file on your system (by default on the Download folder) and click on it. After that, the setup wizard will open (Shown below image):
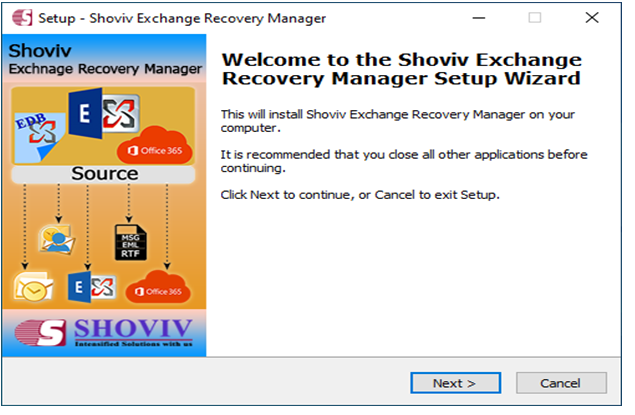
Click on the Next button.
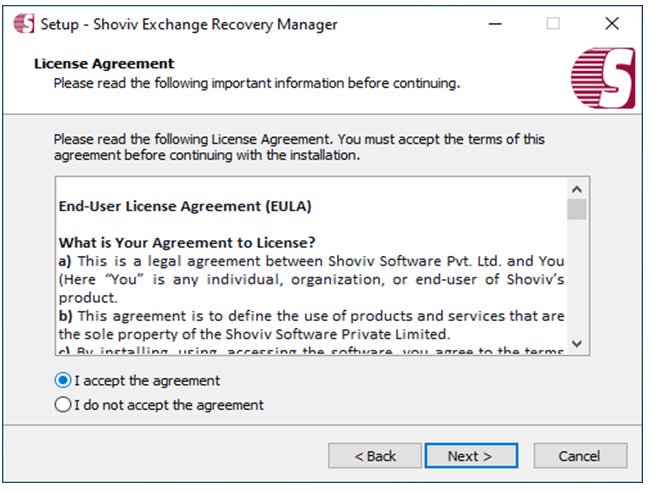
Accept the End-User License Agreement.
Then click on the Next Button and browse the location where you want to install the software.
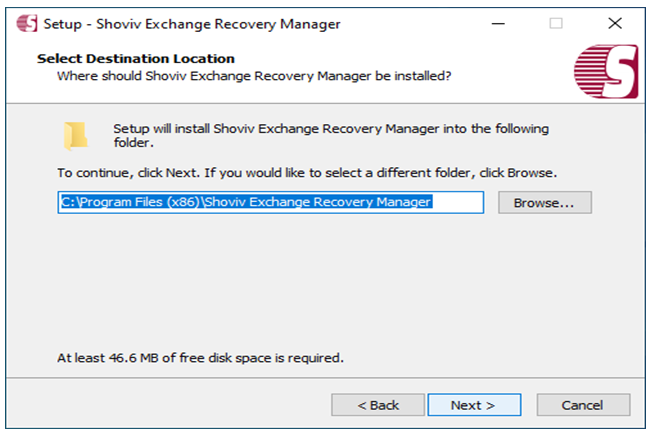
Now click on the Next button. After that, the software will ask you to create a desktop shortcut and quick launch shortcut, choose according to your needs.
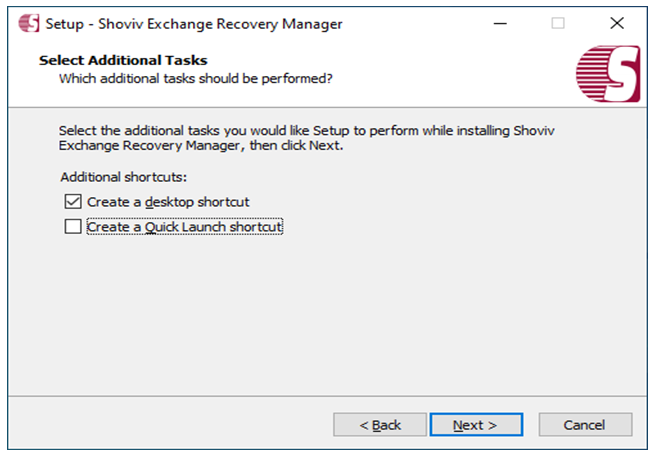
Now, click on the Next button, then the software will provide you an overview of your Destination location and Additional Tasks, verify it.
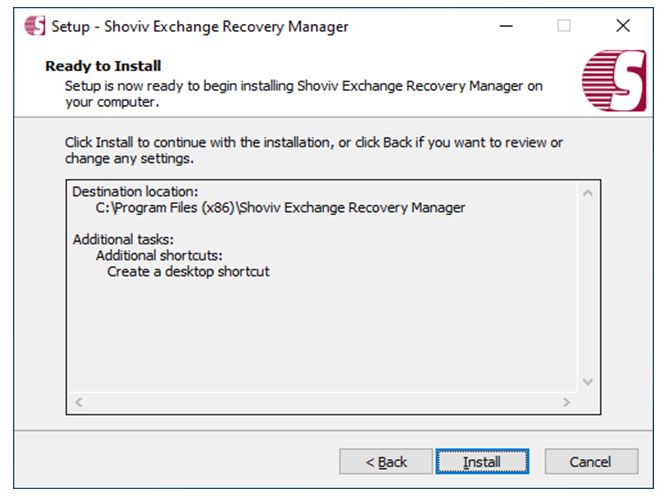
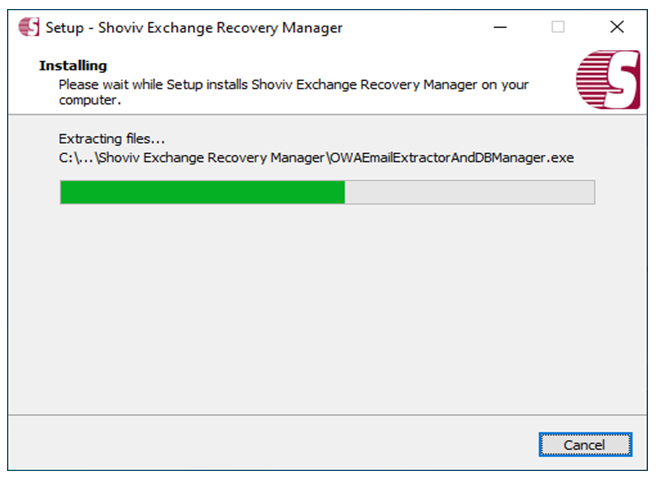
Here, click the Install button. Now, wait for the software to get installed. It will take a few seconds
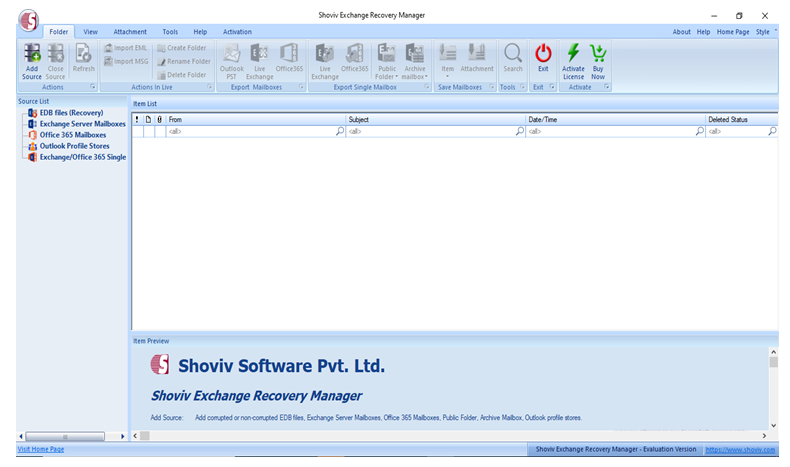
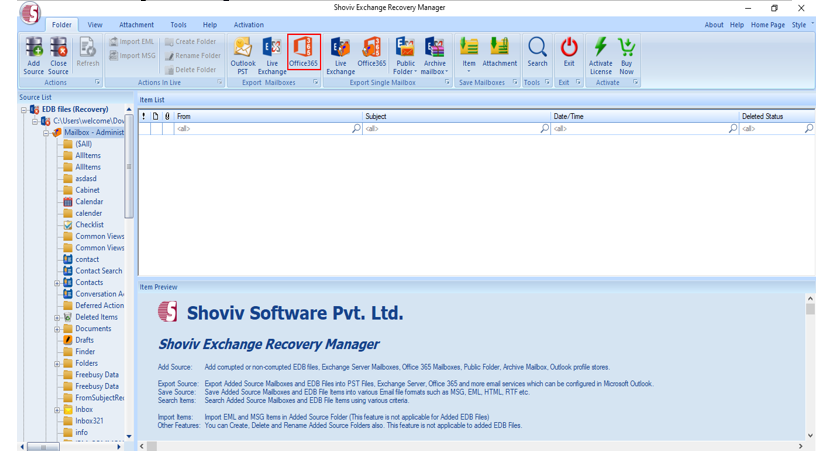
When we open the software, GUI is the first thing that a user notices. Shoviv Exchange Recovery manager keeps a convenient and user-friendly GUI. Its interface makes the software easy to use for everyone. Even a non-technocrat can recover and migrate their mailboxes from EDB to Office 365 effortlessly.
The software can efficiently recover both types of EDB files (.pub and .priv EDB) along with the EDB items (Emails, Calendar, Contacts, Tasks, etc.) without altering the folder hierarchy and data integrity.
Now, you will see the process to import EDB to Office 365 along with the helpful features of Shoviv Exchange Recovery).
Add EDB file:
The software allows users to add multiple mailboxes as a source. To add the source mailboxes, users have to select the Source type like EDB files, Exchange Server, Office 365, and Outlook Profile.
To add EDB file, click on the browse/search option. In case your EDB file is created in Exchange server 2003 or lower versions also select the STM file.
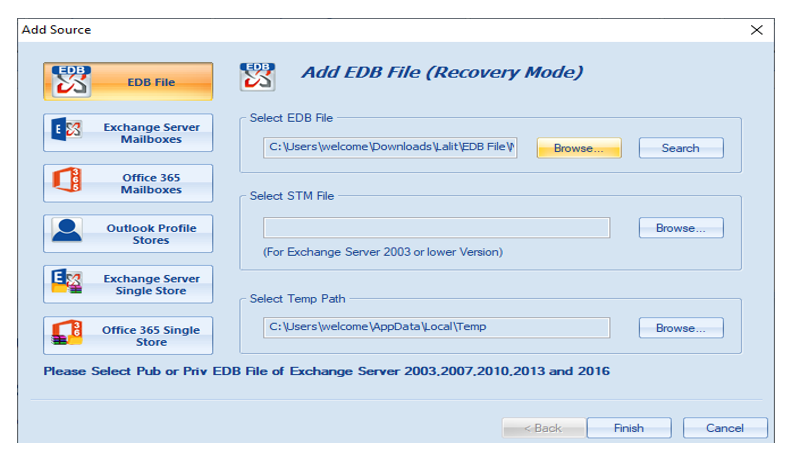
Once you add the source file, click on the Finish button. After that, the software will fetch all the mailboxes and provide a preview of added source’s EDB data.
Export EDB to Office 365:
To export EDB files to Office 365 users need to select the mailbox from the left pane of the software, then click on the Office 365 option from the ribbon bar. Then the Export Mailbox into Office 365 Wizard will get Open with the Mailbox Selection Page.
- Mailbox Selection:
Now the software will ask you to Check/Uncheck subfolders. Users can also include/exclude Mailboxes folders.
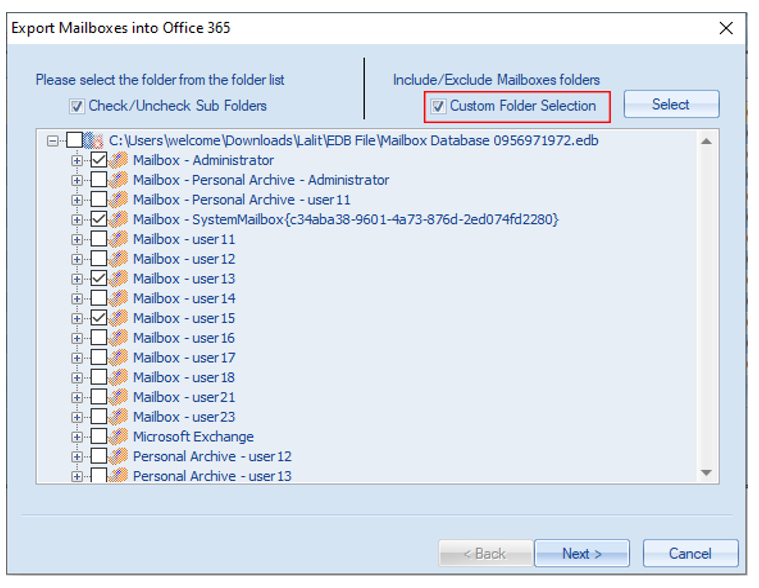
When you check on the Custom folder Selection option, a dialog will appear.
From this dialog box, you can select Mailbox Folder with Include/exclude option, and one can also add the desired folder which they want to include/exclude.
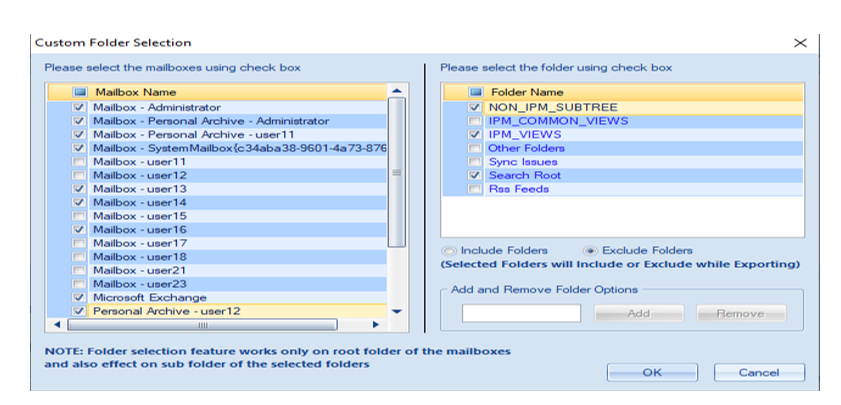
After selecting Mailboxes and Folder, Click Ok.
Then click the Next button. After that, the Target credential dialog will open.
- Target Credential:
After that, you have to provide the Office 365 credentials correctly. Users can also fetch mailboxes from Outlook profile. For this, you have to create an Outlook profile from Control Panel. Note: Outlook profile should be online (cache disabled).
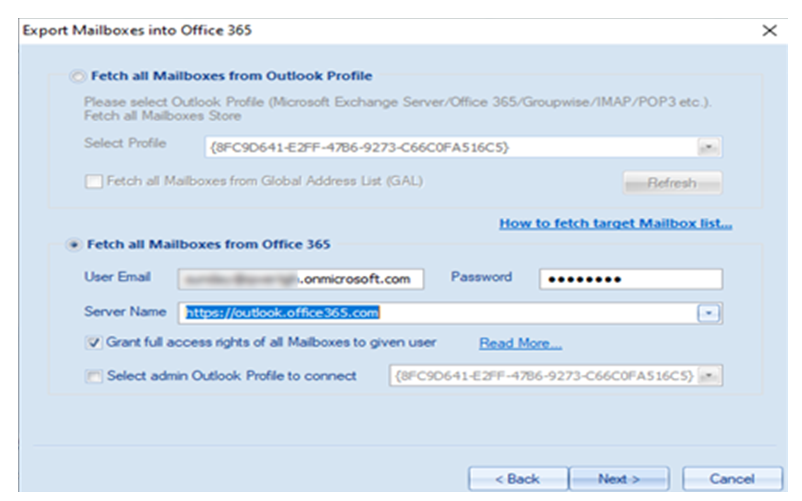
Once you are done, click on the Next button. Then the Map Mailboxes page will show.
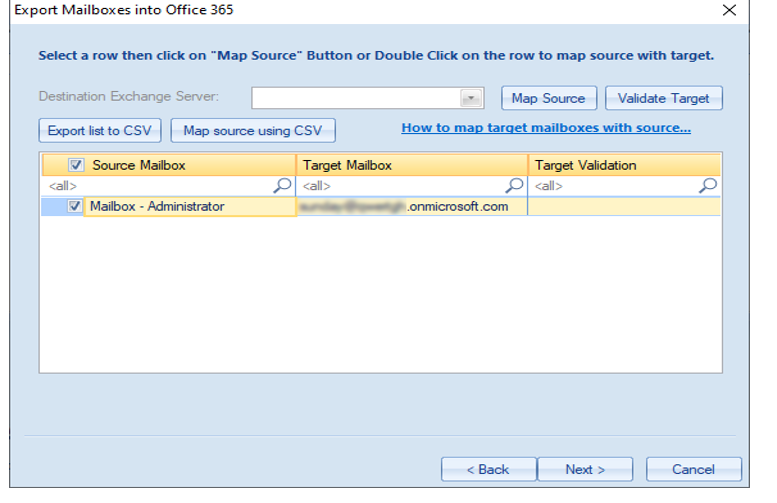
- Map Mailboxes:
Software smartly maps the source and target user mailboxes if it finds the same name. Map Mailbox option allows users to map source mailboxes with the target mailboxes manually. You also can map mailboxes using a CSV file.
- Map Mailbox using CSV file: This option comes in handy when you have several mailboxes. In this option, you have to create a CSV file containing the source user mailbox in one column and the target mailbox in another column.
- Export List to CSV: This option allows you to Export the mapping list into CSV format for later use.
(Click here to know more about the Map Mailbox option).
Now, Click on the Next Button. Now the Filter options dialog will open.
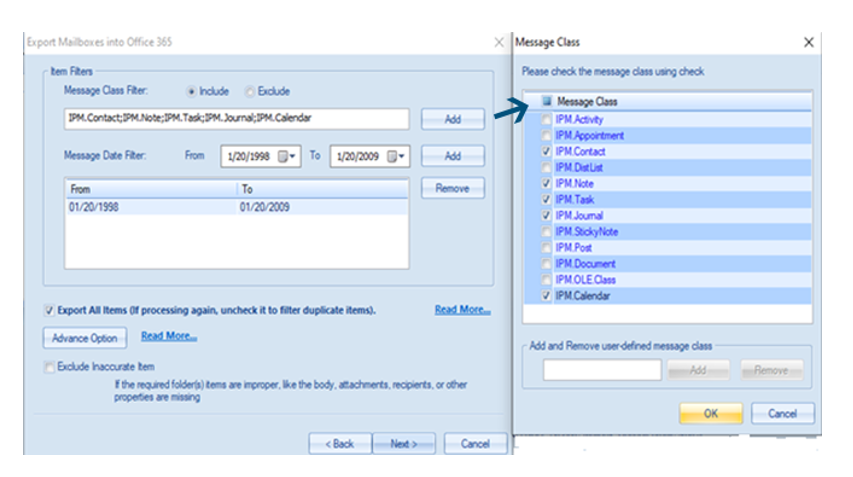
- Filter Options:
The software has a Filter feature; based on the Message Date filter (From, and To) and Include/Exclude Message Class (IPM Note, IPM Activity, and many more).
Prev
Select Message Class: To Add a message class, click on the add button and then choose the message class.
Add Message Class: Users can enter message class name in the text box and click on the Add button.
Incremental Backup/Export
The Incremental export feature is the best feature of the software; it comes in handy to resume the process if it interrupts. Besides this, the Incremental Export option prevents duplicity while importing the same source again to the same target.
To export Incremental data in EDB to Office 365, you have to uncheck the “Export all items” option.
(Click here to know more about the Incremental Backup).
(Note: If you did not uncheck the Export all items option, then the software will Export all items again).
Advance Option:
In this feature, users can migrate data with the Folder Mapping and Email Translation feature.
- Folder Mapping: With this feature, users can map the source folder to the target folder without any hassle. (Folder mapping option only works on Root Folders).
- Email Translation feature comes in handy to import data from one server to another server. Using this feature, the user can change the source domain into the target domain. The email translation feature is beneficial as it simplifies the process by removing flaws.
(Click here to know more about Advance feature).
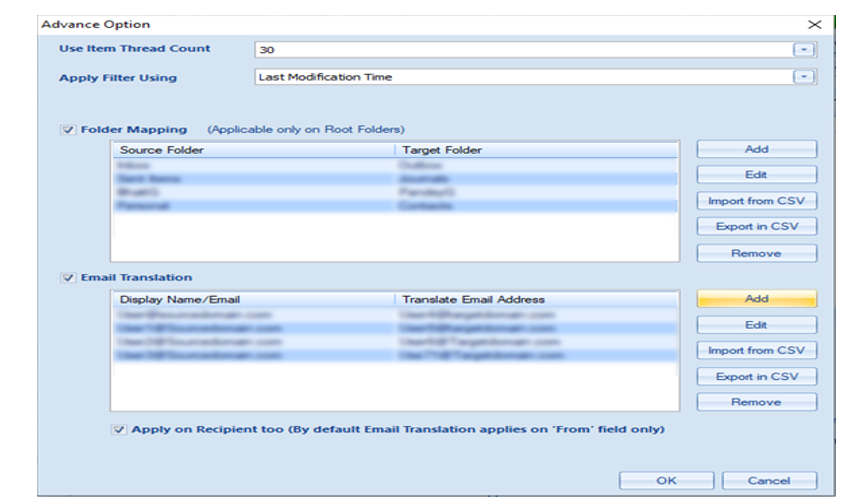
Once you done with advance option, click the Ok button.
Now click the Next button and you will see the status page.
- Live Log Report:
Once you done with the EDB to Office 365 process, the software provides a live log report. The log report contains all the information regarding the process like Folder Names, Item count, Process Item, status, etc. Users can save the log report in HTML format.
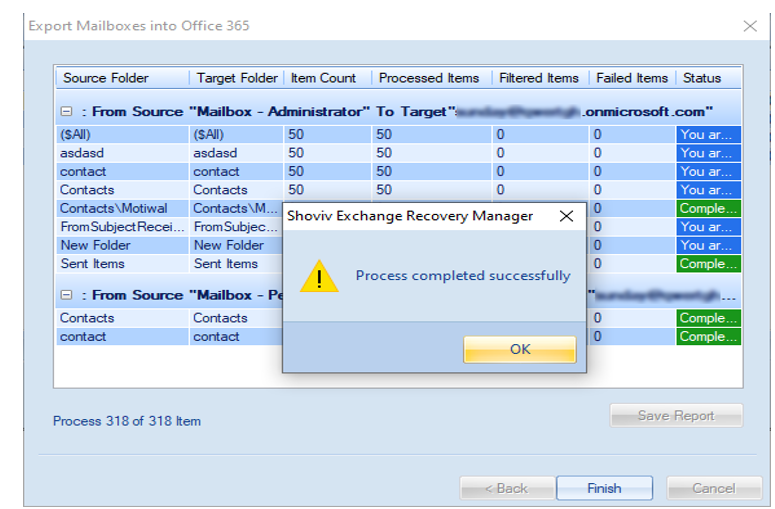
Once the process gets completed, click on the Finish button.
Compatibilities:
The software is developed with an advanced algorithm that makes this tool compatible with all versions of the Windows Operating system, Microsoft Outlook, and Windows Server.
Microsoft Outlook: Outlook 2019, 2016, 2013, 2010, 2007, 2003 or 2000.
Windows Operating System: Windows 10/ 8.1/ 8/ 7/ Vista/ and Windows XP.
Windows Server: 2003/2008/2008 R2/2012/2012 R2/ as well as 2016 (Any of them).
Conclusion:
Shoviv Exchange Recovery Manager is an emerged solution to recover and migrate EDB to Office 365. It also can recover hardly deleted items from the deleted folder of Exchange Server mailboxes, Office 365 mailboxes, and Outlook Profile Stores with migration/importation. The software has lifetime validity and free technical support. This software is an astounding and a longtime utility for Exchange administrators as well as other data recovery/migration engineers as it frequently gets updated with helpful features.

