Windows Azure today is a very popular platform in IT world, therefore I thought to write a basic article that will show you how to create a new virtual machine.
The capabilities of Windows Azure doesn’t end, you can establish a new server in few minutes with full features, You also can create a kind of template which consists several servers and deploy the whole environment- just from one template by the way to this feature calls “AlwaysOn“.
Waiting for us close to 3000 feature on Marketplace:
The Marketplace:

So let’s start.
On Windows Azure, you have to click on “+” and then select Computer > Operating System you want

In this window we need to fill basic information such as the Host Name, User, Pass:

After that, we need to select in our pricing Tier which means how many resources you want to assign to servers.

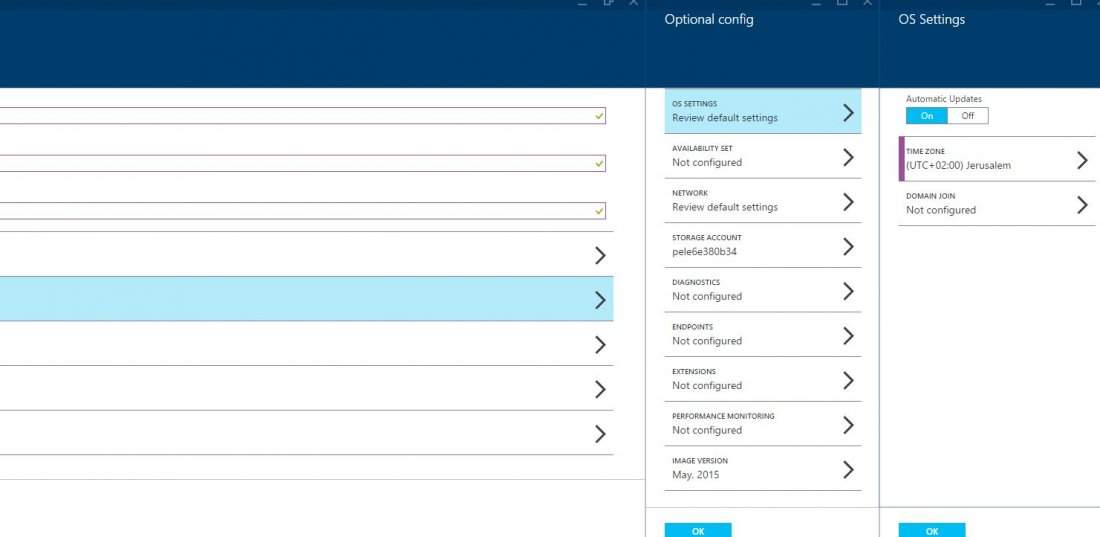
In the next figure you need to set the Time, performance, Diagnostic, Monitor, Windows Update, join the machine to the domain:
After we finished with the optional configuration we can click on resource group which provides us the possibility to add this server to a group.
We also have to specify the location we want(important) – Central US, South Central, East Asia.
Right now the server is in creating progress:

less than 5 minutes we have a new server:

Connect:

Once I clicked on connecting a new RDP file download on my computer:

Click on the RDP file and we will get the server: